Installing Arch Linux on the BeagleBone Black
Fri 19 August 2016
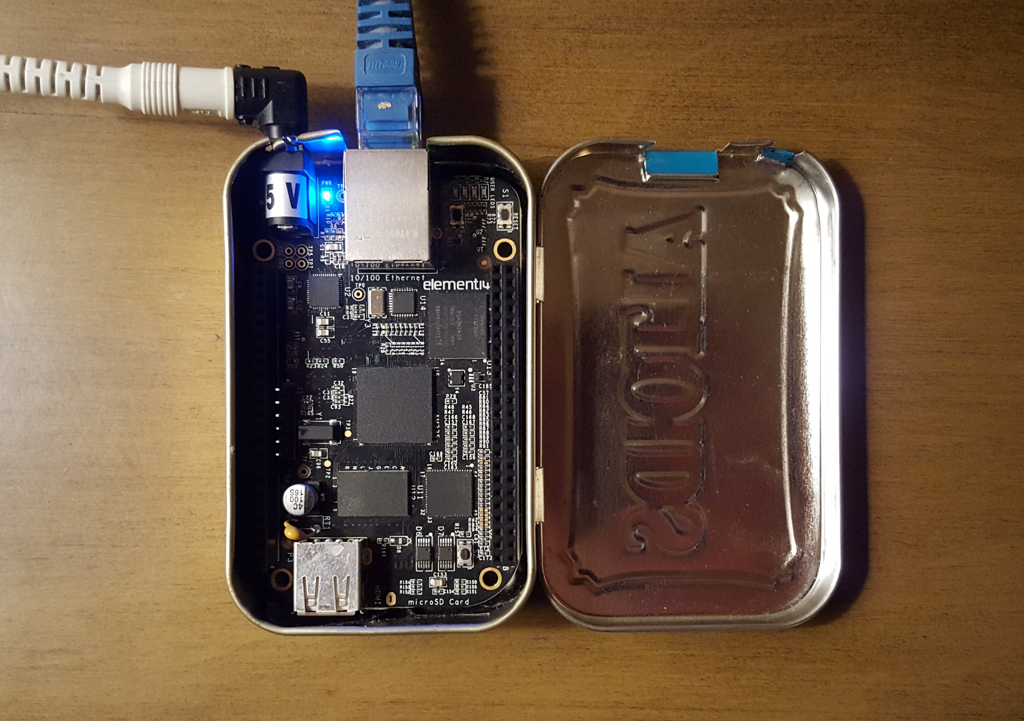
The BeagleBone Black in its Natural Habitat
I've been having a lot of run playing with a BeagleBone Black these days, which is a spiffy little single-board computer. In specifications it is similar to Raspberry Pi, but it has a lot of general purpose IO pins on it; you can think of it as a marriage between the Pi and an Arduino (in fact, it has two Programmable Realtime Units -- on-board micro-controllers -- so that you can do input and output with micro-controller-accurate timings, but I haven't really played with that yet).
The Debian Linux distribution is the recommended OS, and it's slick. The problem is that it comes with a whole lot of things enabled -- the OS itself takes up about 95% of the EMMC!
These days my Linux distribution of choice is Arch Linux, a minimalist distribution that's fun to use in the way that Slackware used to be fun in the early 90's. But the process of installing Arch on the BBB -- or any computer for that matter -- is a bit complicated. Even so, the Arch distribution only take up perhaps 25% of the memory, leaving plenty of room for doing stuff.
There is information on the web about installing Arch on the BBB, but there are a few conflicts and errors, so I wanted to put together a tutorial, from start to finish. I also wanted to bring a few different sources of information together in one place. I have a really bad memory, so if I want to do something twice I have to keep pretty detailed notes.
I used a laptop running Arch to do this, so it's arch all the way down.
Preparing the MicroSD Card
For this process you'll need a 4 GB microSD flash card and an adapter for your computer. The cards themselves sometimes come with a USB adapter, which is what I use.
The instructions here are largely correct (with an exception in the flashing process), but they leave a little to the imagination.
The first step, of course, is downloading the current version.
As a prerequisite, it's important to know which device the card represents itself as to your computer -- an error here could destroy your host computer's disk!
The easiest way to do this is to insert the card with a USB adapter and take a look at the output of dmesg:
[103078.114271] usb 1-1: new high-speed USB device number 7 using xhci_hcd
[103078.311179] usb-storage 1-1:1.0: USB Mass Storage device detected
[103078.311236] scsi host5: usb-storage 1-1:1.0
[103078.311295] usbcore: registered new interface driver usb-storage
[103078.312321] usbcore: registered new interface driver uas
[103079.316420] scsi 5:0:0:0: Direct-Access     Generic- SD/MMC   ....
[103079.901835] sd 5:0:0:0: [sdb] 7698432 512-byte logical blocks: ....
[103079.902058] sd 5:0:0:0: [sdb] Write Protect is off
[103079.902060] sd 5:0:0:0: [sdb] Mode Sense: 03 00 00 00
[103079.902270] sd 5:0:0:0: [sdb] No Caching mode page found
[103079.902272] sd 5:0:0:0: [sdb] Assuming drive cache: write through
[103079.904101]  sdb: sdb1
[103079.905158] sd 5:0:0:0: [sdb] Attached SCSI removable disk
[103080.194846] EXT4-fs (sdb1): mounted filesystem with ordered data mode...
so in this case the correct device is /dev/sdb.
Creating the Partition
You will want to zero-out the first few blocks of the card and create a partition (ext4, primary, including the whole disk). This can be done with the commands:
sudo dd if=/dev/zero of=/dev/sdb bs=1M count=8
sudo fdisk /dev/sdb
Danger Will Robinson: It's common practice when posting code snippets like the above to substitute something like /dev/sdX in the code, so that if someone just cuts & pastes without thinking nothing disastrous takes place. If I were a kind man I would do this too. But I haven't. So really, if you're following these instructions be careful. Verify which device the card presents itself as before you do anything with dd, fdisk, and the like!
As an example of the session:
mark@lucid:/usr/really-local/beagle/new$ sudo dd if=/dev/zero of=/dev/sdb bs=1M count=8
8+0 records in
8+0 records out
8388608 bytes (8.4 MB, 8.0 MiB) copied, 0.00818393 s, 1.0 GB/s
mark@lucid:/usr/really-local/beagle/new$ sudo fdisk /dev/sdb

Welcome to fdisk (util-linux 2.28).
Changes will remain in memory only, until you decide to write them.
Be careful before using the write command.

Device does not contain a recognized partition table.
Created a new DOS disklabel with disk identifier 0x3e44d174.

Command (m for help): o
Created a new DOS disklabel with disk identifier 0x760035cb.

Command (m for help): p
Disk /dev/sdb: 3.7 GiB, 3941597184 bytes, 7698432 sectors
Units: sectors of 1 * 512 = 512 bytes
Sector size (logical/physical): 512 bytes / 512 bytes
I/O size (minimum/optimal): 512 bytes / 512 bytes
Disklabel type: dos
Disk identifier: 0x760035cb

Command (m for help): n
Partition type
   p   primary (0 primary, 0 extended, 4 free)
   e   extended (container for logical partitions)
Select (default p): p
Partition number (1-4, default 1): 1
First sector (2048-7698431, default 2048):
Last sector, +sectors or +size{K,M,G,T,P} (2048-7698431, default 7698431):

Created a new partition 1 of type 'Linux' and of size 3.7 GiB.

Command (m for help): w
The partition table has been altered.
Create the File System
sudo mkfs.ext4 -O ^metadata_csum,^64bit /dev/sdb1
Mount the File System and Create the Image
mkdir mnt
sudo mount /dev/sdb1 mnt
sudo bsdtar -xpf ArchLinuxARM-am33x-latest.tar.gz -C mnt
sync
Create the Boot Loader
This is a strange one -- we'll be writing data directly to a file system with dd:
sudo dd if=mnt/boot/MLO of=/dev/sdb count=1 seek=1 conv=notrunc bs=128k
sudo dd if=mnt/boot/u-boot.img of=/dev/sdb count=2 seek=1 conv=notrunc bs=384k
sync
sudo umount mnt
At this point we should be able to insert the card and boot it from the slot. Depending upon what OS is already on the BBB, you may -- or may not -- need to push the user boot button: with Debian it seems necessary, with Arch Linux it seems necessary to not push the button. Sometimes. Frankly, I haven't been able to figure out when the user boot button needs to be pressed. Try it first by pushing it, and if that doesn't work try it without the push.
Connecting for the First Time
One must boot the newly minted card and connect to the device. This is a bit easier if one has a regular BeagleBone laying about -- the BeagleBone has a USB serial console upon boot, which has been removed from the BBB. If you only have the Black, you'll need to attach the device to your network, examine the router to see what IP is assigned, and SSH directly (using the credentials alarm/alarm). If you have the BeagleBone, you can use the USB console:
sudo screen /dev/ttyUSB0 115200
You're now running Arch from the microSD. You'll want to configure it a bit and flash it to the internal memory.
Configuring the Card
Upon booting you will want to configure USB networking. This way you'll be able to connect directly over a USB cable, so you won't have to keep running over to your router whenever something needs attention.
The first thing to do is to enable the module that is needed for USB Ethernet:
echo g_ether > /etc/modules-load.d/g_ether.conf
Next you'll want to enable and start the USB network. First, create the file /etc/netctl/usb0 with the following content
Connection=ethernet
Description='Connection via USB'
Interface=usb0
IP=static
Address=('192.168.7.2/30')
And the interface needs to be enabled and started:
netctl enable usb0
netctl start usb0
At this point USB networking should be working, so you can boot down the BBB and attach it to your computer directly. Note, however, that we haven't brought DHCP up on the board, so your USB network interface will need to be assigned an IP address by hand (for which you should use 192.168.7.1). On my laptop I run Network Manager and this is very easy to do from it's widget.
If you have done the above and are now connected through the USB, the BBB, by default, will not be able to connect to the Internet. To do that you'll need to add a default gateway on the board and enable packet forwarding on your computer.
Default Route
route add default gw 192.168.7.1
Packet Forwarding
On the host machine you'll need to add port forwarding. On my laptop (running Arch) this can be done with the following commands (as root):
sysctl net.ipv4.ip_forward=1
iptables --table nat --append POSTROUTING --out-interface wlp4s0 -j MASQUERADE
iptables --append FORWARD --in-interface enp0s20u2u2 -j ACCEPT
On other machines the interfaces may have different names, but the procedure is the same. You can use the ip link command to see what your interfaces are named.
Update Your Software
Now you'll want to upgrade and at least install wget:
pacman -Syyuu
pacman -S wget
Flashing the BBB
The flashing of the device is similar to the initial card creation.
Download the Image and Install to Flash
For this process the device to use for partitioning is /dev/mmcblk1, and the partition is /dev/mmcblk1p1 (note that the naming convention is a little different than for /dev/sda, as there is an extra character):
wget http://os.archlinuxarm.org/os/ArchLinuxARM-am33x-latest.tar.gz
dd if=/dev/zero of=/dev/mmcblk1 bs=1M count=8
fdisk /dev/mmcblk1
mkfs.ext4 -O ^metadata_csum,^64bit /dev/mmcblk1p1
mkdir mnt
mount  /dev/mmcblk1p1 mnt
bsdtar -xpf ArchLinuxARM-am33x-latest.tar.gz -C mnt
sync
Write the Boot loader to Flash
Similarly:
dd if=mnt/boot/MLO of=/dev/mmcblk1 count=1 seek=1 conv=notrunc bs=128k
dd if=mnt/boot/u-boot.img of=/dev/mmcblk1 count=2 seek=1 conv=notrunc bs=384k
Configuring the Flash
The easiest way to configure the flash, now that it has been written, it to install the arch-install-scripts package and use the arch-chroot command:
pacman -S arch-install-scripts
arch-chroot mnt
We are now running in a chroted environment, and can configure the card. First, as always, we should upgrade:
pacman -Syyuu
We can do most of what we could do if we had booted directly to the card, such as create users, install software, configure the system, etc. Importantly, we probably want to enable USB networking as above. Changing the host name, installing avahi, and enabling it are also probably good things to do.
Once you've configured everything you want to configure. exit from the chroot shell, unmount the flash, and sudo poweroff. The next time you boot from flash you should have a new system installed.
Miscellaneous Configuration Stuff
rc.local
Perhaps I'm just old-school, but I like to have /etc/rc.local for site-specific stuff.
Create /etc/rc.local
The file should be valid from a shebang and chmod perspective.
Create the Service file.
Create a service file, /etc/systemd/system/rc-local.service
This file should contain:
[Unit]
Description=/etc/rc.local compatibility

[Service]
Type=oneshot
ExecStart=/etc/rc.local
# disable timeout logic
TimeoutSec=0
#StandardOutput=tty
RemainAfterExit=yes
SysVStartPriority=99

[Install]
WantedBy=multi-user.target
Enable with systemctl enable rc-local.service
VNC
For remote access it's useful to install and configure VNC on the device. This will allow you to work on a desktop remotely.
To do this a few packages must be installed:
- fluxbox (or some other window manager)
- x11vnc
- xorg-server-xvfb
- xterm
- ttf-dejavu
For example:
pacman -S fluxbox x11vnc xorg-server-xvfb xterm ttf-dejavu
Next you will want to create a script to launch the vnc server:
#!/bin/bash

dbus-launch x11vnc -create -usepw -forever \
  -env FD_PROG=/usr/bin/startfluxbox \
  -env X11VNC_FINDDISPLAY_ALWAYS_FAILS=1 \
  -env X11VNC_CREATE_GEOM=1700x1000x24
The first time the script is run it should be done manually (by the user under which the server should be run) so that the password can be entered. After this is done it can be added to rc.local to start automatically, for example:
sudo -u mark /home/mark/startvnc.sh &
will start the script as user mark.
Of course, other window managers can be used. If such is the case the FD_PROG entry in the above script should be changed.
I actually installed the enlightenment window manager once to see it if would work -- and it did -- but servicing the eye candy took about half of the CPU.
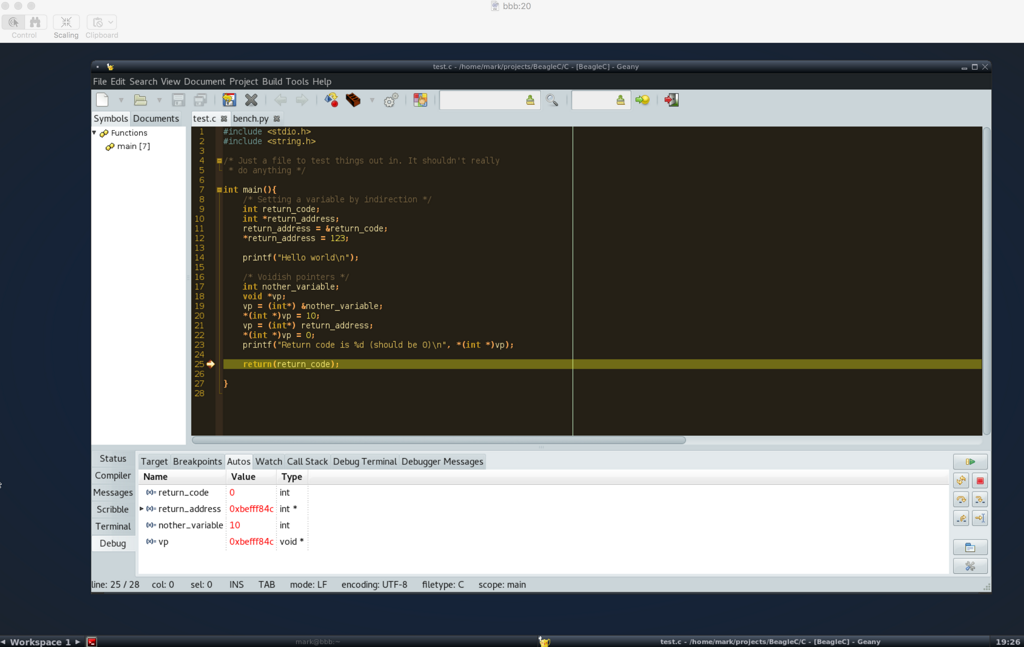
Fluxbox Running over VNC Connection
Random Numbers
The BBB has a hardware entropy source, so it's good to use it
Install rng-tools
Configure rngd.
This is done by editing the /etc/conf.d/rngd file and placing the following in it:
RNGD_OPTS="-o /dev/random -r /dev/hwrng"
Enable the service:
systemctl enable rngd
systemctl start rngd
Disable haveged (optional)
Note that there is a bug in the rngd service file that prevents it from starting at boot, so you'll probably have to manually start the daemon whenever you reboot (systemctl start rngd).
AVAHI
AVAHI/Bonjour/Zeroconf is useful, in that you can connect to your BBB via it's name (so you won't have to check your router for it's assigned IP address). Some computers -- like a MacBook -- will understand this natively, whereas others (like an Arch Host) will need a little configuration.
On the BBB:
pacman -S avahi
systemctl enable avahi-daemon.service
systemctl start avahi-daemon.service
The name it announces will be the name in /etc/hostname with .local appended, i.e.:
ssh kahuna@alarm.local ; # alarm is the default name for BBB Arch
If you're running Arch on the machine you're connecting from you'll first need to install a few packages:
pacman -S avahi nss-mdns
systemctl enable avahi-daemon.service
systemctl start avahi-daemon.service
You will also need to edit /etc/nsswitch.conf to include the following line:
hosts: files mdns_minimal [NOTFOUND=return] dns myhostname
Stuff Still to be Done
- Setting up DHCPD on the BBB USB so that the host computer receives an IP address automatically.
- Getting BoneScript up and running: Thus far I have been unable to compile or install a version of node.js that works with BonesScript.